How to start a food blog that makes you money
Are you a foodie that wants to start a blog but have no idea where to begin? This post will show you exactly how to start a food blog that makes you money!
This post contains affiliate links, to learn more, read my disclosure policy.
I started my food blog less than 2 years ago and have been able to make over $10,000 a month from it already! I was able to quit my full-time job after 8 months of working super hard on my blog and I will be showing you exactly how you can too!
How to start a food blog
It can be super overwhelming in the beginning and you may not know where to start or what to do. I know when I was starting my blog, I was researching like crazy and wished there was a way to get all of the information from one post!
There are 5 simple steps to start your own food blog:
I will be going over every little detail in each section so you know exactly how to set up your own blog in less than 1 hour!
1. Get clear on what you want to blog about
Before starting a food blog, you need to decide WHY you want to start a blog and WHAT you want to blog about. Blogging isn’t going to be a get-rich-quick scheme. It takes time, effort and lots and lots of patience! You have to be willing to work on it like a full time job whilst making no money for the first few months!
I started my blog completely by accident! I was on my own weight loss journey and documenting it on TikTok when I got tons of requests for recipes. So I began filming and posting recipes to TikTok every day and around this time I stumbled across a video on YouTube titled ‘how I make $9000 a month blogging’. I was super intrigued, watched it and was really inspired to start my own blog. I already had lots of recipes to post and knew exactly what my blog would be on and so began my blogging journey.
Once you’ve decided that you want to start a blog and what you want to blog about, it’s time to start setting everything up!
2. Create a memorable name and buy the domain
Your domain address is what people will be typing into to search bars to find your website. My domain name is weightlosswithveera.com and it’s the same as all my social handles. You can buy a domain (usually around $10 a year) or you can get one free with Bluehost hosing (more on this later).
Make sure you use something that is:
Simple – Make sure your domain name isn’t something too complicated and that it is a name that can easily be found when browsing online.
Memorable – You want your readers to remember your blog so they come back to it and recommend it to others so make sure it’s something that can easily be remembered and associated with your brand!
Related to your goals – And lastly, make sure your domain name is related to your goals. What I mean by this is if you want to eventually turn your blog into a business, make sure it is something you can build a brand around. Or if you want to eventually sell your blog then give it a name that can easily be sold.
3. Pick a host & download WordPress
This is the easiest part of starting a blog for sure! There are tons of hosts and providers to choose from but I only recommend (and use) Bluehost for hosing and WordPress for my blog.
Pick a host
It’s super easy to set up hosting for your blog. With Bluehost, you can get your domain name (for free!), set up hosting and automatically get WordPress on your blog all at the same time! I have a self-hosted WordPress website and that’s what I recommend to you for your own food blog!
I have only used and 1000% recommend using Bluehost. Firstly they are INSANELY cheap! You can get it for just $2.95 a month! My favorite thing about Bluehost though, and the reason I recommend it so much is for its customer service. They are available 24/7, I can not tell you the number of times I have been freaking out about something on my blog and they were there to help straight away!
1. Go to the Bluehost website.
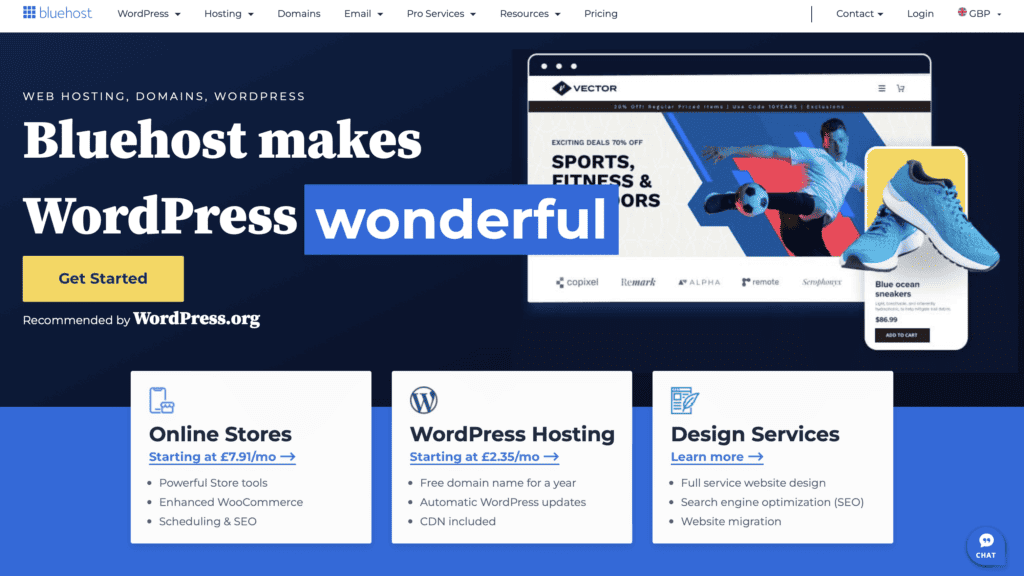
Once you’re on the website, click the yellow button that says ‘Get started’.
2. Choose your plan.
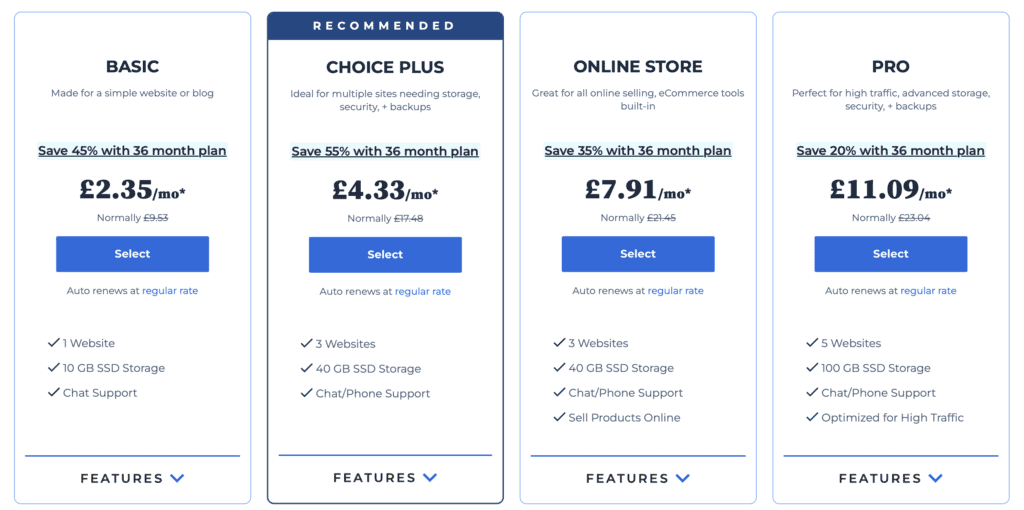
Once you’ve clicked ‘get started’, you’ll be directed to a page where you can choose your hosting plan. When I started, I went with the basic plan which was super cheap and did everything I needed it to.
3. Insert your domain name.
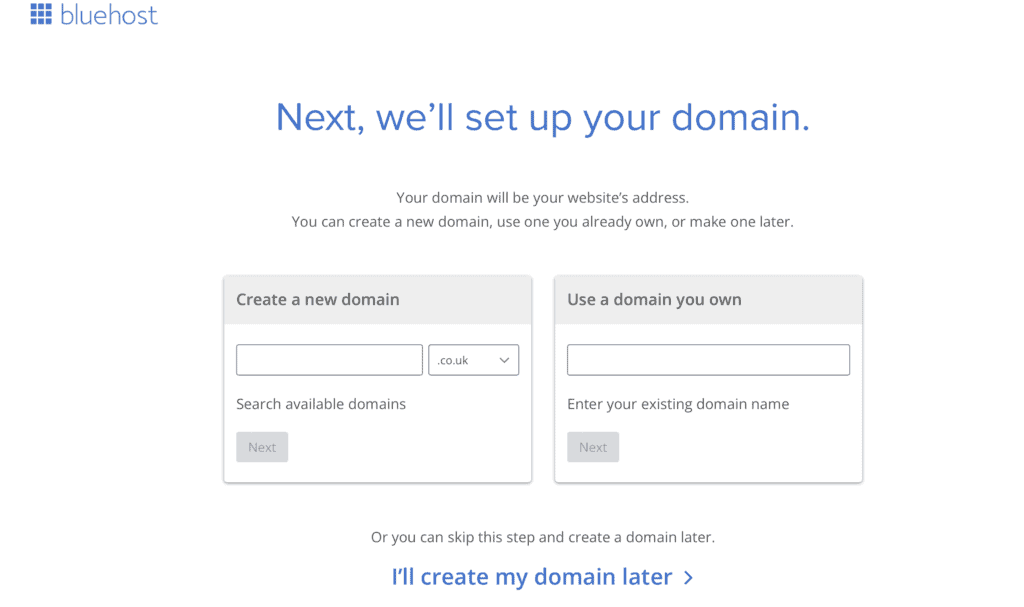
Once you’ve chosen your plan, you can now choose your blog name. As mentioned above, this is really important and ideally you would have it picked out before you get started. But if you’re not sure what to name your blog just yet, don’t worry because you can pick it out later! Just click the button that says ‘I’ll create my domain later’.
If you already have a domain, you can just type it into the section that says ‘use a domain you own’.
4. Create your account.
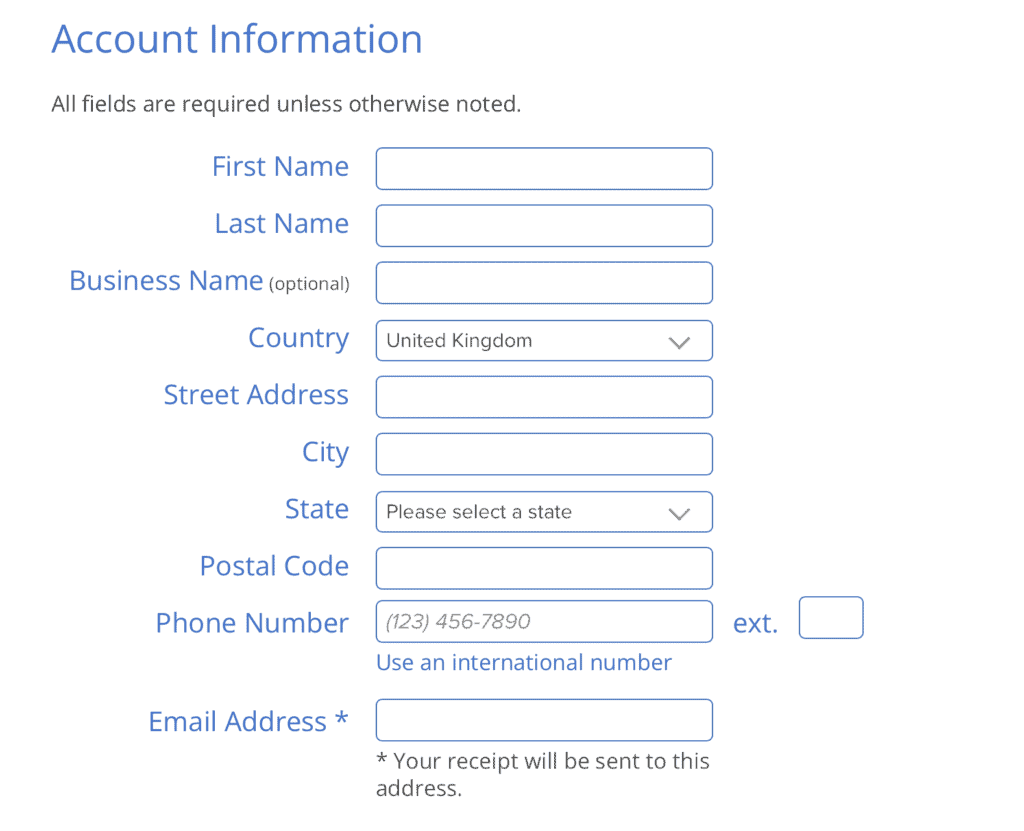
Once you’ve set up your domain name, you need to set up your account. Make sure you’re putting the correct details.
To get the cheapest rate, I recommend the 12-month or 36-month plan, I went with the 12-month plan.
You also have the option to add any extras to your package but it’s no necessary at all. I didn’t add any when I started and my blog has been perfectly fine!
5. Complete your purchase & set up your password.

Once you have created your account, you will need to enter your card details to pay for your hosting service. Once the transaction is complete, you will receive an email to create your password. Make sure it’s something unique and memorable as you will need this to log into your website.
Download wordpress
If you use Bluehost as your host, you won’t actually need to do this step as they automatically install WordPress onto your site! Once you have WordPress installed, you will be prompted to create a password so you can log into your WordPress site.
You can also download WordPress here – make sure you are on WordPress.org to get a self-hosted WordPress site!
4. Pick a theme and design your blog
This is defiantly the most exciting part! Designing your website can be so much fun as you can pick out your colors, fonts, styles and the aesthetic for your blog!
Once you have WordPress set up, you will be prompted to pick a theme for your blog. Themes dictate what your blog will look like. Some themes are free and others are paid. Free themes are great if you’re on a budget but there isn’t much you can customize and they often don’t look super professional.
You can get WordPress themes for super cheap and they will make your site look really appealing! My first theme was this one I punched from Etsy for around $30! The theme came with instructions and I set everything up myself (I am the least tech savvy person and figured it out so you will too!). Even though setting up a theme can be overwhelming, picking a theme with good, clear instructions makes it much easier. Eve, (who I bought my theme from) was a literal ANGEL! She responded to my emails promptly and was always available if I wanted to adjust or customize something. I had this theme for 1 year and 6 months and loved it, but I wanted something a little more customizable.
I went with Savannah from 17th avenue designs which is the theme I have currently and I love it! It was a little more expensive ($149) but definitely worth every penny. I set this theme up myself too and it was a very smooth process!
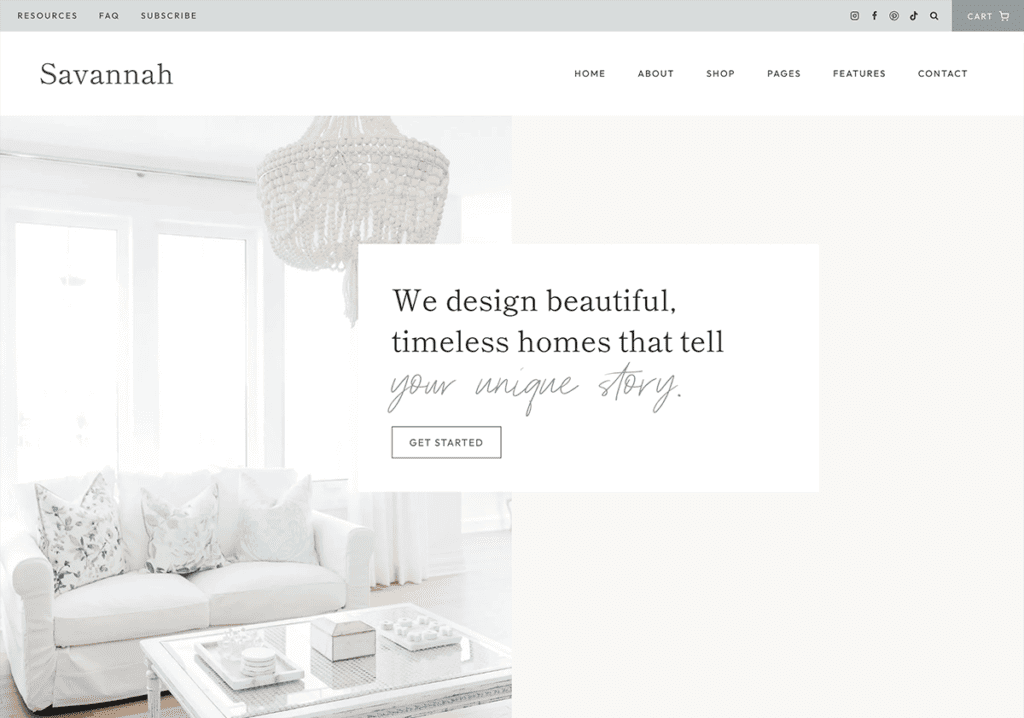
Whichever theme you end up picking, make sure it is 1) something you are happy with as it is your site and your brand, 2) a user and mobile friendly site as most readers will be reading from mobile and 3) has great reviews!
That’s it, you now have a blog up and running!
5. Start blogging!
Now that you have everything set up, it’s time to get writing! The only way to make sure your blog is successful is getting your content out there. Start whipping up your recipes, take great photos and get them up!

